Skype IM Pretty Printer
VBA macro for Outlook that nicely formats a Skype chat excerpt and pastes it into a new message.
Download Now and refer to the installation instructions, or read on.
The Problem
Nicely formatted chat…
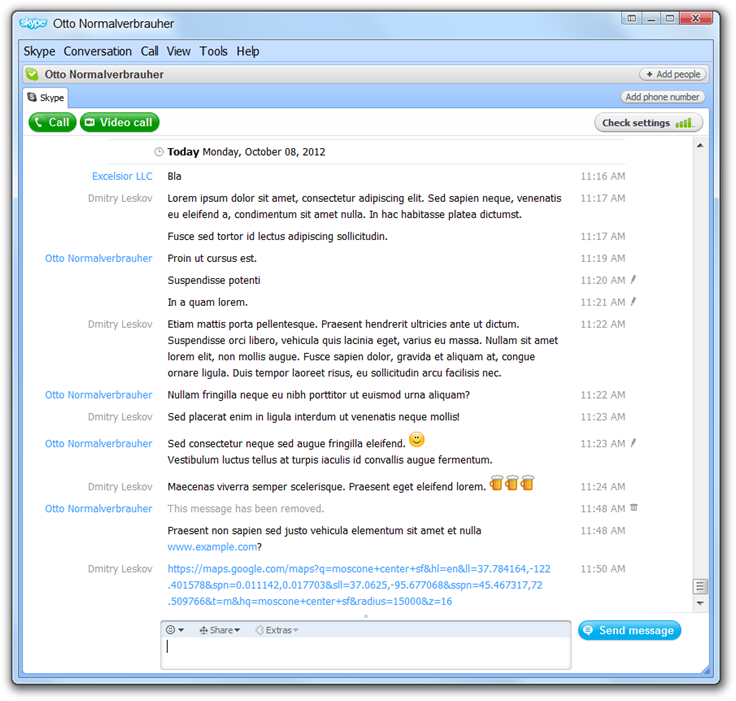
- Clearly seen participant names
- Non-obtrusive timestamps
- Visually separated messages
- Clickable URLs
- Emoticons
…becomes alphabet soup
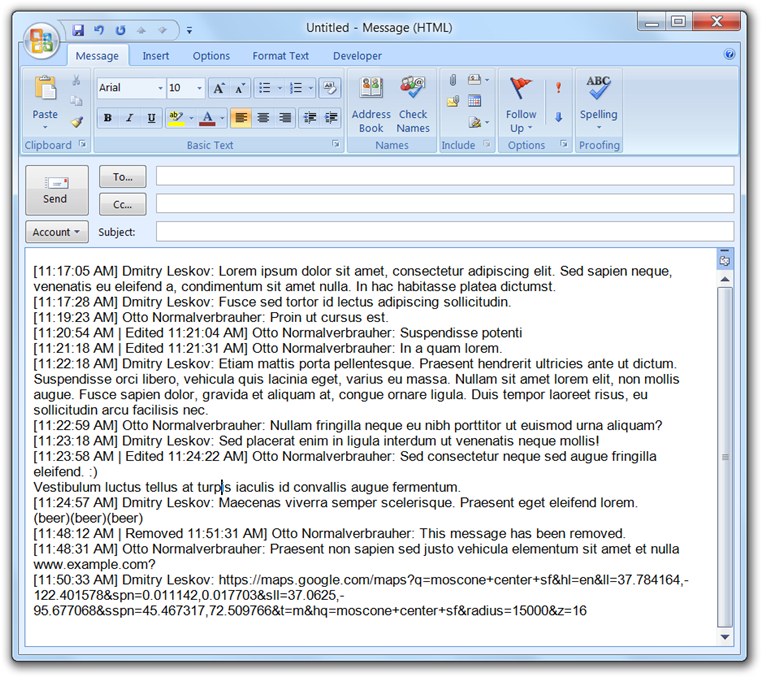
- Looks like one block of text
- No dates shown if the chat is fresh…
- …yet timestamps clutter the view
- Author names are hard to identify
- URLs/emoticons are not recognized
The Solution
Outlook VBA comes to the rescue! What else would you have expected from a project done by a Director of Marketing, anyway?
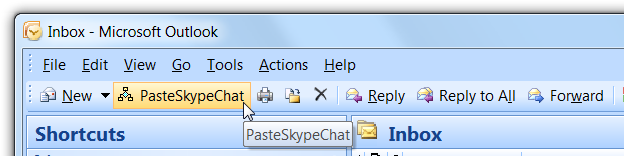
Just 200 lines of code and my Outlook has a toolbar button…
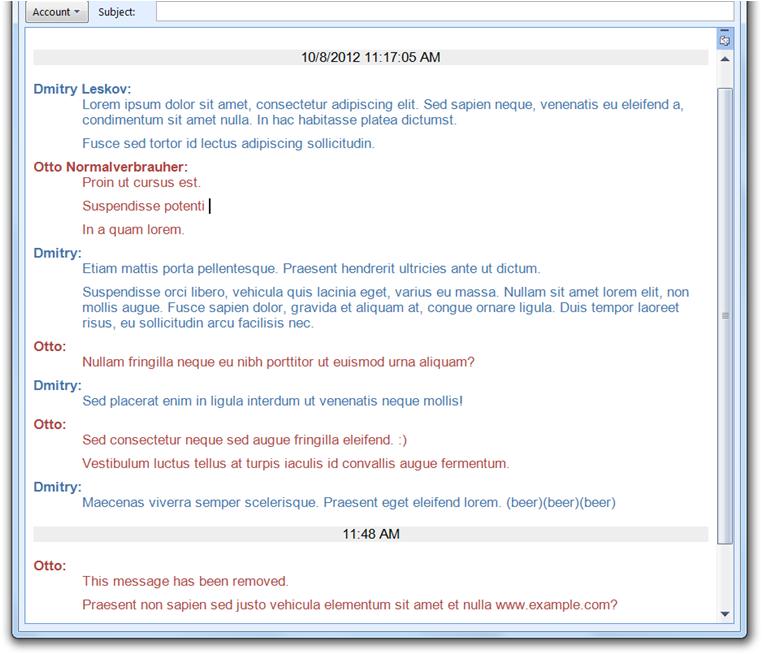
…which creates a new message and pastes a nicely formatted chat in it!
- Participant names empahsized, shortened on repeat
- Full date inserted at the top
- Timestamps appear only after long breaks
- There is vertical space between messages
Installation
Unfortunately, I know of no elegant way to distribute VBA macros, and I have not had the time (and skills) to convert this macro into an Outlook COM Add-in. So below is the manual installation procedure that has worked for my colleagues at Excelsior.
NOTICE I have only verified the below instructions against the US English version of Outlook 2007.
Step 1: Create a Digital Certificate
If you have never created or installed any Office macros, you need to create a self-signed digital certificate first. Otherwise, you may skip this step.
- From the Start Menu, select All Programs / Microsoft Office / Microsoft Office Tools / Digital Certificate for VBA Projects
- Enter a name for the certificate, e.g. your Windows user name, and click OK.
Step 2: Enable Signed Macros
- In the main Outlook window, select Trust Center from the Tools menu, and then select Macro Security.
- Make sure that the option Warnings for signed macros; all unsigned macros are disabled is selected and click OK.
Step 3: Import the Macro
- Press Alt-F11. The Visual Basic Editor shall open.
- On the File menu, click Import File.
- Select the SkypeIMPrettyPrinter.bas file and click Open. SkypeIMPrettyPrinter will appear in the list of modules.
-
On the Tools menu, click References.
If Microsoft Forms Object Library is not checked, check it and click
OK, otherwise click Cancel.
(If you do not have that library listed at all, see Troubleshooting.) - On the Tools menu, click Digital Signature, then click Choose…, select the previously created certificate, and click OK (twice.)
- Exit Outlook. Before closing, it will prompt you to save VbaProject.OTM. Confirm the save.
- Launch Outlook again.
-
If you have created a new digital signature on Step 1,
do the following:
- Try to open the Visual Basic Editor, e.g. by pressing Alt-F11. You should see a security notice dialog at this point, warning you that the publisher has not been authenticated. That is expected behavior, as you are using a self-signed certificate.
- Click Trust all documents from this publisher.
- Close the Visual Basic Editor.
Step 4: Add a Toolbar Button
- On the Tools menu, click Customize, then select the Commands tab, and select Macros in the list of categories.
- Drag the freshly added SkypeIMPrettyPrinter macro to the desired place in the Outlook toolbar.
- Right click the just added toolbar button to customize it further — choose the display style, rename, and/or change the default icon.
- Close the Customize dialog.
Step 5: Test
- Copy some messages from a Skype chat to the clipboard.
- Click the Outlook toolbar button you have just added.
- If everything is alright, a new Outlook message shall be created contaning the formatted messages from your Skype chat.
Installation Troubleshooting
If you do not have any Office macros with forms, Microsoft Forms Object Library may not be listed under Tools/References at all. To force it into the list, select UserForm from the Insert menu. (This will add an empty form to the project, which you may later remove if you wish.)
Legal Stuff
Skype IM Pretty Printer is written by Dmitry Leskov (me), and open sourced under the MIT/X11 license.
However, as I have created it during an internal Hack Day, the copyright belongs to the company.